How to Tell If a Bird Is Dead
Finding a motionless bird can stir worry and sadness. You want to help, but first you must know: Is it truly deceased, or just stunned? Determining this accurately prevents accidental harm to living birds and protects you from potential health risks like salmonellosis or avian flu. The stakes are higher than you might think.
Quick research shows rigor mortis, the stiffening of muscles, begins within 2-6 hours post-mortem and lasts 12-24 hours. Understanding these timelines and physical signs is key. Let’s explore how to assess a bird’s condition safely and confidently.
Quick Answer
To determine if a bird is dead, observe these signs:
- No visible breathing: Watch for chest/abdomen movement (10-50 breaths/min in healthy birds).
- Unresponsive to stimuli: Clap hands softly or cast a shadow overhead.
- Closed/sunken eyes: Healthy birds keep eyes open.
- Limp posture: Wings and legs should relax, not stiffen.
- Rigor mortis: Gently touch the chest (wear gloves!) for rigidity.
If unsure, wait 30-60 minutes before touching. Always prioritize safety with gloves/masks.
Problem / Pain Point: Finding a Bird That May Be Dead
Discovering a motionless bird triggers a mix of emotions, concern, sadness, and urgency. You want to act, but uncertainty paralyzes you: Is it truly gone, or just stunned? Misjudging this can accidentally harm a living bird through rough handling or expose you to diseases from deceased wildlife. The lack of clear guidance leaves many feeling helpless, risking both avian welfare and human health.
This guide resolves that uncertainty with expert-backed steps.
Quick Answer / Key Insight: First Step—Observe from a Distance
Before touching, assess from afar. Watch for chest movement (breathing), eye response, or reactions to gentle stimuli like a soft clap or shadow. If no signs appear, wait 30-60 minutes, some birds (e.g., hummingbirds) enter torpor, appearing dead but alive.
This pause prevents accidental harm. If the bird remains still, proceed to closer inspection with gloves and a mask to avoid parasites or bacteria.
Problem / Pain Point: Finding a Bird That May Be Dead
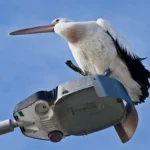
Image: A motionless bird on the ground, illustrating the initial discovery scenario.
This moment is fraught with questions: Is it injured? Sick? Deceased? Without clear signs, well-intentioned actions can backfire.
For instance, picking up a stunned bird might stress it further, while mishandling a deceased one could spread disease. The emotional toll compounds the practical risks, making reliable guidance essential.
Quick Answer / Key Insight: First Step—Observe from a Distance
Step 1: Watch for Breathing
Healthy birds breathe rapidly (10-50 breaths/minute). Look for subtle chest or abdomen movement. If still, note the time and proceed.
Step 2: Check Responsiveness
Gently clap hands or move a stick near the bird. A living bird will react, flinch, open eyes, or attempt movement. No response?
Continue observing.
Step 3: Wait 30-60 Minutes
Birds like hummingbirds enter torpor, slowing metabolism. Patience confirms if stillness is permanent or temporary.
This method ensures you act only when necessary, minimizing stress to the bird and risk to you.
Core Explanation / How It Works: Key Signs of Bird Mortality
Birds exhibit clear physical changes post-mortem. Recognizing these signs distinguishes death from injury or torpor:
- No Breathing: Absence of chest movement indicates ceased respiration.
- Closed/Sunken Eyes: Healthy birds keep eyes open; closure suggests neurological shutdown.
- Limp Posture: Relaxed wings and legs (no tension) signal muscle relaxation.
- Rigor Mortis: Muscles stiffen 2-6 hours after death, peaking at 12 hours. A rigid chest confirms mortality.
- Cool Body: Deceased birds lose body heat; skin feels cool to the touch.
These signs align with avian physiology, as per Cornell Lab of Ornithology guidelines. Rigor mortis, in particular, is a definitive indicator when present.
Features / Components / What's Inside: Bird Vital Signs to Assess
When evaluating a bird, focus on these critical features:
| Sign | What to Look For | Why It Matters |
|---|---|---|
| Breathing | Chest/abdomen movement (10-50 breaths/min in health). | Absence confirms respiratory failure. |
| Eye Response | Open, alert eyes vs. closed/sunken. | Closed eyes indicate neurological cessation. |
| Muscle Tone | Limp wings/legs vs. rigidity (rigor mortis). | Rigidity confirms death; limpness may mean injury or torpor. |
| Responsiveness | Reaction to stimuli (sound, shadow). | No response suggests unconsciousness or death. |
| Body Temperature | Warm (alive) vs. cool (dead). | Cooling begins shortly after death. |
Assess these systematically to avoid misdiagnosis.
Benefits & Drawbacks / Pros and Cons: Why Accurate Assessment Matters
Benefits of Proper Evaluation:
- Prevents harm: Avoids stressing injured birds through unnecessary handling.
- Health safety: Reduces disease transmission risks (e.g., salmonellosis).
- Legal compliance: Enables correct disposal per local regulations.
- Peace of mind: Confirms humane outcomes for wildlife.
Risks of Misjudgment:
- Handling a diseased bird without protection.
- Disturbing a nesting bird’s recovery.
- Improper disposal contaminating environments.
Accurate assessment turns uncertainty into informed action, as emphasized by the CDC’s zoonotic disease guidelines.
Step-by-Step Process / How to Guide: Safe Bird Mortality Assessment
Follow these steps to assess a bird’s condition safely:
- Observe from Distance (30-60 min): Watch for breathing, eye movement, or responses to stimuli.
- Approach Cautiously: Wear gloves and a mask to avoid parasites/bacteria.
- Check Rigor Mortis: Gently touch the chest. Rigidity confirms death; flexibility may indicate torpor or injury.
- Determine Next Steps:
, Alive but injured? Contact a licensed wildlife rehabilitator (USDA APHIS directory).
, Deceased? Proceed with safe disposal.
Disposal Steps:
- Bury 3+ feet deep in a sealed bag.
- Place in double-bagged trash (check local laws).
- Clean the area with disinfectant.
Never handle birds with bare hands, and wash thoroughly afterward.
Use Cases / Best For / Who It's Right For: When to Use This Guide
This guide serves:
- Homeowners: Finding birds near windows or gardens.
- Pet Owners: Checking outdoor birds near enclosures.
- Gardeners/Hikers: Encountering birds in natural settings.
- Educators/Parents: Teaching children about wildlife observation.
- Post-Storm/Migration: Assessing birds after extreme weather or seasonal shifts.
Whether you’re a casual observer or a wildlife enthusiast, these steps ensure humane, safe responses to bird discoveries.
Mistakes to Avoid / Common Errors: Pitfalls to Watch For
Avoid these missteps:
- Mistaking Torpor for Death: Hummingbirds and others enter energy-saving states. Observe for 30-60 minutes first.
- Bare-Hand Handling: Risks disease transmission (e.g., salmonellosis, avian flu). Always use gloves.
- Improper Disposal: Throwing birds in regular trash can spread contaminants. Follow burial or sealed-bag protocols.
- Ignoring Local Laws: Some areas require reporting deceased wildlife to authorities.
Pro Tip: If unsure, contact a rehabilitator, they’ll guide you based on the bird’s species and condition.
Costs / Pricing / Data / Specs: Relevant Data Points
Key metrics for context:
- Rigor Mortis Onset: 2-6 hours post-mortem.
- Peak Rigor Duration: 12-24 hours.
- Safe Observation Window: 30-60 minutes.
- Healthy Breathing Rate: 10-50 breaths/minute.
- Burial Depth: Minimum 3 feet to deter scavengers.
These timelines and specs, per veterinary and wildlife standards, ensure accurate assessments.
Expert Tips / Pro Advice: Insights from Wildlife Professionals
- Use Tools: A small mirror or flashlight can help check for chest movement without touching.
- Species Matters: Smaller birds (e.g., hummingbirds) enter torpor more frequently, extend observation time.
- Clean Thoroughly: After handling, wash hands with soap and water for 20 seconds.
- Support Rehabbers: Donate to local wildlife centers, they rely on public funding.
- Document Findings: Note the bird’s location, appearance, and condition for rehabber reference.
By staying informed and prepared, you become a steward for both wildlife and community safety.
Safety / Legal / Compliance / Warnings: Important Precautions
Prioritize safety and legality:
- Wear Protection: Gloves and masks prevent disease transmission (e.g., salmonellosis, avian flu).
- Avoid Contact with Pets/Children: Keep them away from deceased birds to prevent contamination.
- Follow Local Laws: Some regions require reporting deceased wildlife to authorities (e.g., USDA APHIS for migratory birds).
- Clean Tools: Disinfect any tools used in handling or disposal.
- Wash Hands: Use soap and water for 20 seconds after handling.
Failure to comply risks public health and legal penalties. Always err on the side of caution.
Maintenance / Long-Term Optimization: Ongoing Practices
Support bird health and safety in your area:
- Clean Feeders/Birdbaths: Prevent disease spread among living birds.
- Use Bird-Safe Windows: Apply decals or screens to reduce collisions.
- Plant Native Flora: Provide natural food and shelter.
- Monitor Nests: Observe from afar to avoid stressing parents.
- Stay Informed: Follow local wildlife alerts for disease outbreaks.
These habits create safer environments for both birds and humans.
Real Scenarios / Case Examples: Practical Applications
Scenario 1: Post-Storm Discovery
After a storm, you find a motionless sparrow. Observe for 30 minutes, no movement. Check for rigor mortis (present).
Dispose via burial, noting the location for rehabber reference if needed.
Scenario 2: Hummingbird Torpor
A hummingbird sits still on a feeder. Wait 60 minutes; it awakens and flies away. Torpor, not death, was the cause.
Scenario 3: Window Strike
A bird hits your window and lies still. Approach with gloves, check for breathing (absent), and confirm rigor mortis. Report to local authorities if required.
Each case underscores the importance of patient observation and safety protocols.
FAQs: Frequently Asked Questions
What if I Find a Baby Bird?
Contact a licensed rehabilitator immediately. Nestlings/fledglings often need specialized care.
How Long Should I Wait Before Touching a Bird?
30-60 minutes. Some birds enter torpor and may revive.
What if the Bird Is Injured but Alive?
Place it in a ventilated box lined with paper towels. Keep it warm and quiet, then contact a rehabber.
Can I Bury a Bird in My Yard?
Yes, if local laws allow. Bury 3+ feet deep in a sealed bag to deter scavengers.
How Do I Report a Dead Bird?
Contact your state’s fish/wildlife agency or USDA APHIS for migratory species.
Always prioritize safety and legal compliance in every scenario.

Similar Posts